Monday, April 30, 2012

Annie Sloan Chalk Paint Dresser

Hi everyone!
In my last post I published the before and during photos of the vintage dresser I was refinishing. I finished up the project last weekend and I think it turned out great! This was my first experience using Annie Sloan chalk paint and wax. The products were so fun to use and gave the dresser a really cool finish. I'm so excited to use it for my next project!

Remember, this is what the dresser looked like before.


And this is the dresser after. I wanted to give it an old beach cottage vibe:)


I'm all excited after this project so I'll be headed back to my local ASCP stockist, Sensible Pearls this week. I'm looking forward to picking up a new color to paint my mid century console I posted about last week. This dresser is for sale. If you're interested you can email me at beachedbo@gmail.com. It's supposed to be seventy-one degrees tomorrow, I may finally be able to paint outside! XO Kelly

Wednesday, April 25, 2012

Annie Sloan Chalk Paint

Hello Stranger!
It's been far too long but its been crazy with the in-laws in town! Always good times but busy! I always think I'm going to have so much more time when they are here because I have babysitters but it never seems to work out that way. We stay busy doing so many other fun things.

Just before my in-laws arrived I picked up a couple pieces of furniture to refurbish while they were here. I though I would finish them in no time with all that free time I had planned. Ha, ha, silly me. Three weeks later I'm just getting to it. I did get one thing accomplished - new paint! On one of our day trips up the Leelanau Peninsula we stopped at a sweet little shop, Sensible Pearls in Suttons Bay. My aunt clued me into this little gem so I had to take a peek. The shop is a stockist of the Annie Sloan Chalk Paint. After roaming around all the beautiful painted things, it didn't take much to talk me into paint, wax, a book and fancy new brush.


I took some time to read over my new book which was super inspiring. The book highlights the many different techniques in using the paint and waxes. There's both a clear and dark wax available. Both can be buffed to a desired sheen. The paint does come in a more limited color palette than a latex would but its meant to mix to give you custom colors as needed. I feel like the limited colors and the freedom of the paint pushes you to be more creative than you would with latex. I kinda like that.

My first piece is an old dresser I bought at our local Salvation Army. It's a solid dresser with a cottage type look to it. Nothing too fancy. Here it is as I bought it. It had a lot of bumps and bruises but I like that sort of stuff.


The dresser had a stained, glossy finish. I got my orbital sander out and went to work. My plan was to refinish the top and drawers with a similar stain color and paint the rest in ASCP, pure white. Here it is after a good sand.


Looking better already. Next I stained the top and drawers in Early American from Cabot.


I liked the wood knobs so I decided to paint them white. They will get another coat of paint, distressing and wax. Here they are before. I screwed them into a box so I could paint them easier.


Here's the dresser as it is now with one coat of chalk paint on the frame. It will get another coat of paint tomorrow and then two coats of clear wax to finish off the paint and stain. I'm planning on distressing the paint.


I'm looking forward to posting the finished product soon! In the meantime I'm coming up with a plan for this  mid century console. Originally I was thinking of a high quality latex paint, white, with a high gloss but now this chalk paint has got me all sorts of curious so may have to stick with it. XO Kelly


Wednesday, April 4, 2012

Master Bedroom - Before & After

Howdy and happy hump day! I've been waiting to post our master bedroom until I was finished painting the closet doors. I've only been working on them since last fall! The doors took a coat of primer and three coats of paint to get them looking good. At the time I had only one set of sawhorses so it took me forever! Then when I was finally finished painting, I was rewarded by having to scrape the sixty window panes. Can you tell I was NOT into this project? Well, on the upside, my parents found the doors for $5.00 so you can't beat that, and I think they add a lot more charm than doors off the shelf from home depot!

Our bedroom was originally a garage added onto the house and then later converted to a family room when a new garage off the back alley was built. The "before" pictures below represent the room as it looked the day we closed on our house.

Before

This picture was taken facing the backyard. The room was stinky, with mildewy carpet, probably from a leaky roof. The room did not have heat which also contributed to the moisture problem.


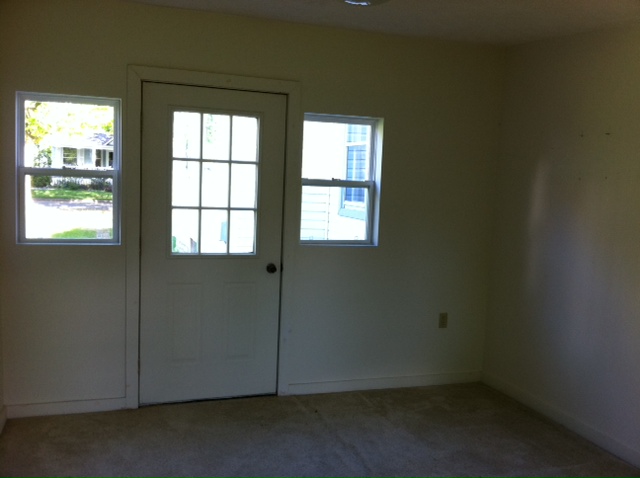
This view is facing the front yard. Yes, there is an exterior door, a little weird but nice in the summer. I envision putting french doors in place of the single and we need to add a master bath. My grand plans for this space will almost definitely require the room to be demolished and rebuilt. Someday...


Here is the view into the hall/mudroom.


After

Upgrades/Updates: New metal roof; closet built; exposed ductwork added to heat room; painted floor; wall paint; window treatments.

Here's the room facing the backyard again. The kitchen and this room are the only two painted something other than white. The walls here are Benjamin Moore's Daiquiri Ice. I think I fell in love with the name as much as the color:)


The water skis, chair and wash basin are vintage picked up locally. The nightstand is an antique gifted to me from my aunt and painted Benjamin Moore Barely Teal.


The nightstand was picked up from a yard sale for $3, I just slapped some paint on it. The framed painting was done by Nathan's great grandfather of the cabin he owned in Mineral King, California.


The floor is just a plywood subfloor that I rolled multiple coats of a glossy white floor sealer on. We had intentions of putting new carpet down but decided to wait to see how the roof did through the winter. The roof is nearly flat so it was suspect to leak. And of course winter came and the ceiling started showing signs of water. Fortunately the winter began mild and dry and we were able to get a roof on before there was any damage.


Here is the other side of the room, facing the front yard. Here you can see the added closet with the $5.00 doors.


Here's a slightly different view where you can see the exposed ductwork that my husband added. Since this room is on a slab and there is not an attic, it was either exposed or boxed-in ductwork. I love the character the exposed gives this somewhat bland room.


My tanker desk:)


DIY linen tackboard.


That's it for now! Hope you enjoyed! XO Kelly